Pages

Monday 27 February 2012

Young Artist Placemats


Years ago, Martha Stewart listed a laminating machine among her “Good Things,” citing it as a useful tool for making placemats, bookmarks and the like.  I’ve never been able to afford a laminator—or the very expensive laminating sheets that go with it—but I did like the idea of laminating personal artwork or pretty paper to make useful gifts. 

Sometimes you find yourself in need of a gift for Grandma, for a teacher, for a coach or a kids’ group leader, and you don’t have a lot of time or resources available to you.  Sometimes you need a way to mark everyone’s places at a daycare or playgroup table.  Sometimes you want a new place setting for the kids or mats for a themed birthday party.  Laminated placemats work well for any of these occasions.

Contact brand’s clear, self-adhesive plastic can be used in place of expensive laminating sheets and a laminating machine.  Sold as shelf lining paper, Contact paper is widely available in grocery stores, hardware stores, and discount department stores like WalMart. 


Although a little more challenging to manipulate than a laminating machine, clear self-adhesive plastic is much less expensive than lamination sheets.  With a little care, you can achieve excellent results that are less brittle and more durable than comparable projects made using a laminator.  (I’ve kept, and used, some of my placemats for decades.)

To make laminated placemats, you’ll need;
  • A placemat you can use for a pattern, or a large ruler so that you can measure and cut some rectangles
  • A sharp pencil
  • Scissors
  • Art supplies for making a picture (We used just crayons for this one but you can use whatever you like.  Crayons, paint, glitter glue, markers, coloured pencils, and stickers all work well.  Just try to avoid materials that will leave a raised surface.  You want the finished picture to be flat.)
  • Poster board or cardboard cut from a large cereal box (You can buy poster board at most stationary or office supply stores and, quite often, at the Dollar Store.)
  • Clear (transparent) Contact self-adhesive plastic

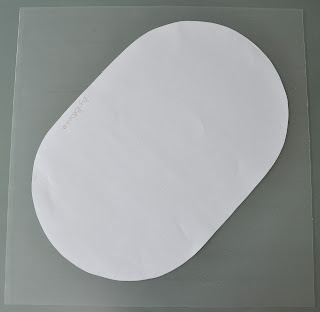
Use a pencil to trace your placemat shapes onto the poster board or cardboard.  (I’ve made a lot of these so I have a pattern.)  You can either trace around a placemat you like or you can measure and cut out 12 x 16-inch rectangles. 


Give the cut mats and art supplies to your kids, and set them to work decorating.  If you want to, you can suggest a theme.

When the kids have finished decorating their mats, allow time for any glue or paint to dry.

Make sure your work surface is clean.  Any bits of eraser, stray pieces of paper, or dust have a way of finding their way under the plastic. 

Unroll the Contact paper, with the backing sheet facing upward.  Lay your placemat on top of the paper (to use as a measuring guide) and cut two pieces of self-adhesive plastic, each slightly larger than the placemat.


Carefully remove the backing from the first sheet of self-adhesive plastic, making sure that it doesn’t curl up and stick to itself as you remove the paper. 


Make sure that the peeled plastic is lying flat, with the sticky side up.  Drop the placemat, picture side down, onto the sticky side of the plastic. 


Carefully trim away some of the excess plastic around the edges.

Remove the protective backing from the second piece of self-adhesive plastic, just as you did the first.  Leave it sticky side up.

With the placemat picture facing upward, drop the placemat—with its plastic covering attached—onto the sticky side of the second sheet of plastic.  Smooth it out carefully, making sure that there’s an edge all the way around the placemat where the two pieces of plastic are adhered to each other. 


Trim away most of the excess plastic, leaving about a quarter inch of clear plastic all the way around the mat. 


Check for air bubbles.  If there are any, pierce them with a pin and then smooth them out as best you can.

That’s it.  You’re done.

If you want to make a quantity of similar mats for use as themed place settings or for a fundraiser, you can glue wrapping paper to the poster board instead of decorating it with artwork. 

Cut the poster board to size, cover it with spray adhesive or glue from a glue stick, then drop it sticky-side-down on to the back (undecorated side) of a sheet of wrapping paper.  Trim the excess wrapping paper away so that the wrapping paper and mat are exactly the same size.  Proceed as directed above.  Your finished mats will look something like these:


_____________________________________________
This post is linked to Busy Monday hosted by A Pinch of Joy, to Making Mondays Marvelous hosted by C.R.A.F.T., to Think Pink Sunday hosted by Flamingo Toes, to Craft-o-Maniac Monday hosted by Craft-o-Maniac, and to Bedazzle Me Monday hosted by Everything Under the Moon.

apinchofjoy.com

DIY projects and crafts


Friday 24 February 2012

A Ring Story

Some years ago I moved to Kelowna.  I was in need of a change and so, for a time, put island life behind me.  Kelowna’s bigger-town vibe and vivid arts community were interesting to me, its geography and flora a complete change from what I’d been accustomed to in my small town island home.

Shortly after my move, I went to work at The Titanium Workshop.  It was unlike anywhere I'd worked before.  The business was, at that time, located in the owners’ home.  All customer interaction was through email or by phone.  There was no dress code and, although regular hours of business were observed, there was no time clock. 

Although the workshop was a manufacturing business, producing titanium rings for sale through a website, the business was (and remains to this day) very much an artistic endeavour.  It started with a single ring, made by one of the owners as a gift for the other, and grew from that simple design to be much, much more.

Titanium rings were not common at the time the workshop started and there wasn’t equipment purpose-built for making them.  The workshop’s early rings were hand drilled and individually lathed, using equipment designed for making machine parts.  Their designs were, of necessity, simple but the workmanship was excellent.  The rings were precisely made and beautifully finished.


I soon realized that work at the workshop was a collaborative effort.  Although each member of our very small staff had a specific job, product creation was a collaborative effort to which each team member brought their own special skills.  

Frederique had training in graphic design and a strong visual aesthetic. 

Roy had crazy-good lateral thinking skills that enabled him to adapt equipment and develop techniques that were completely new and amazingly innovative. 

A number of talented machinists brought their technical skills to bear on solving production problems, coming up with new and better ways to carve titanium. 

Brain used his CAD skills and design savvy to bring customer ideas to life and to explore ideas of his own in three dimensions. 

Customers brought their ideas and requests to the workshop, affording our team an opportunity to step outside our own limitations and embrace concepts that would not otherwise have occurred to us.

As titanium rings grew in popularity, the workshop faced new competition in the form of rings cheaply manufactured in countries like China.  Frustratingly, the rings these overseas factories produced were often direct copies of designs that had originated through our hard work and, although they were mass produced (often from inferior materials) and finished to a much lower standard, their price tags had customer appeal.

Despite these challenges, The Titanium Workshop has retained its market niche, mostly through the original thinking and innovation that have characterized their business from the start.

They made titanium rings with gold inlays, then carved the inlays.  


They found a way to carve rings with prong style stone settings.


They made the first titanium ring with a multiple stone setting 


and have gone on to extrapolate those techniques into some amazingly creative designs.  


They developed and executed amazingly detailed carved designs, 


made specialized coatings, added bright accents of anodized colour,


and executed a myriad of custom designs, made to their customers’ requests.

Now they're working on developing a line of pendants, including this brilliant, Steampunk inspired design.  (The gears in this pendant actually turn!)


I worked at The Titanium Workshop for more than eight years.  As is often the case in a business where a number of creative people who work with different visions share a workspace, the path was not always smooth. It was, however, always stimulating, always challenging, and always a learning process.

My time at the workshop changed forever my outlook on what work can be.  It helped me to understand that there is more to employment than just earning a wage and that, while everyone may have a different vision, it is possible to work at something important to you and still find a way to earn a living.

At first glance, making rings may have nothing at all to do with writing blogs, but there is an interrelation here:  It’s about finding your one thing and working toward it.  It’s about meeting challenges and finding a way to make your vision work.  So, thanks Fred and Roy for the lesson.  I’m grateful to have worked with you.
________________________________________
Please note: This blog is not a paid endorsement.  Although they knew I was writing a piece about them, The Titanium Workshop did not see the contents of the piece until after it was published.

 All of the images in this post are property of Arnell Workshop Inc. d.b.a. The Titanium Workshop, and are used with their permission.  

Sunday 19 February 2012

Pancake Day


What does a group of English women racing down the street, tossing pancakes in cast iron skillets, have to do with the temptation of Christ in the desert? 

At first blush, nothing at all. 

But Shrove Tuesday is the day before Lent. 

Lent is the season in the Christian liturgical calendar when congregants remember Christ’s forty-day fast in the desert.

Traditionally, Lent is a time when devout Christians give up certain luxuries. 

Historically, those luxuries have included oil and butter, milk and eggs. 

Prudent English housewives, not wishing to waste food, would use these ingredients to make pancakes the day before Lent. 

Thus, Shrove Tuesday became known as Pancake Day.

The race?

Well, folk tradition says that a diligent housewife was so busy making pancakes that she lost track of time until she heard the church bells ring.  Not wanting to be late, she rushed out of the house, pan and pancake still in hand.  

Whatever its origins, Pancake Day is our kind of observance.  We do love a good pancake supper at our house.

This Shrove Tuesday, we’ll be eating Pancake and Fried Egg Sandwiches, made with a fried egg between savoury pancakes flavoured with bacon and cheddar cheese, and served with a bright tasting pico de gallo. 


Here are the recipes so you can try them too.

Make the Pico de Gallo first.  You’ll need:


  • 2 large tomatoes (I used Romas because they looked the least yucky.  It can be very frustrating to shop for tomatoes at this time of year.)
  • 1/4 of a large red onion
  • 1 jalapeño pepper (or more, to taste)
  • 1 lime (or more, to taste)
  • Cilantro or parsley to taste (Not pictured.  I usually add it but didn’t have it this time so we did without it.)
  • Salt and freshly ground black pepper 

Dice the tomatoes and red onion in about a quarter inch dice. 

Finely dice the jalapeño.  (We prefer our salsas mild so I removed the seeds and ribs from the pepper.  If you want more heat, leave them in.)

Chop the cilantro or parsley.

Combine the diced tomatoes, onion, jalapeño, and cilantro or parsley in a bowl and stir them together.  Squeeze the lime’s juice over the vegetables.  Taste and season with salt and black pepper.  Add more lime juice if you think the mixture needs more acidity.


Set the Pico de Gallo aside to rest and let the flavours marry while you make the rest of the meal.

To make the pancakes, you’ll need:


  • 1 cup buttermilk (If you don’t have buttermilk, put 2 Tablespoons of lemon juice in the bottom of a measuring cup and then add enough milk to make one cup.)
  • 1 egg, at room temperature
  • 3 Tablespoons of canola oil
  • 1/3 cup yellow cornmeal
  • 2/3 cup all purpose flour
  • 1 teaspoon baking soda
  • 1/2 pound of bacon, finely diced and cooked crisp (One of our local farm markets sells locally produced, fruitwood smoked bacon. It’s very good but quite expensive.  They slice it right at the market and sell the oddly shaped ends from each rasher at a discount.  I used those ends in this recipe.  It’s a more affordable way to enjoy really good bacon.)
  • 1 cup of grated sharp cheddar 
Beat the egg.

Mix the buttermilk, egg, canola oil, and cornmeal together, stirring until the mixture is very smooth and well blended. 


Whisk together the flour and baking soda.  Add them to the wet mixture, stirring just until the ingredients are combined.  The batter should be very lumpy. 


Add the bacon and the grated cheese and mix them through the batter.


Ladle the batter onto a pre-heated griddle and cook at medium heat until the pancakes start to set around the edges and little bubbles rise to the top. 


The bottom of the pancake should be lightly browned.

Turn the pancakes over and cook the other side until it’s lightly browned too. 

Keep the cooked pancakes warm in the oven while you cook a fried egg for each serving.

Make sandwiches by layering each fried egg between two of the pancakes.  Serve the sandwiches immediately, garnished with Pico de Gallo.  


Recipe note:  This pancake recipe makes six pancakes, enough for three sandwiches.  If you are using all of the pancakes for sandwiches, you'll need to fry three eggs.  The pancakes are quite filling so , if accompanied by a salad, the recipe will serve three adults.  
__________________________________________
pancake race photo:  jeffreyhill.typepad.com

Wednesday 15 February 2012

Rhubarb Berry Jam


In the years after the Second World War, convenience foods were heralded as the greatest benefit ever to arrive in the home kitchen.  After the deprivations and shortages of the war years, it must have seemed miraculous to open a tin or package and find all the ingredients needed to make a meal.  So quick!  So simple!  And at the time, this food was also believed to be both wholesome and nutritious. 

The homemaker of the 1950’s had some unexpected hurdles to deal with.  It was a time of great social change with widespread emphasis on modern science as a beacon of hope for the future.  Anything modern or new or “space age” was greeted with great enthusiasm.  At the same time, the economy was in a recession that continued until nearly the end of the decade.

With many homemakers struggling to make ends meet, convenience foods took on a special glamour.  Cooking with convenience foods implied that you had the luxury to choose ease over affordability.

The jam recipe I’m going to share with you today originated some time during that post-war convenience food craze.  It’s made with fruit flavoured gelatin dessert powder instead of with pectin and it yields a smaller batch than most traditional jam recipes.  It relies upon refrigeration for preservation, rather than canning. 

This was the first jam I ever made, I think because—having never made preserves of any sort—I found the ingredients and cooking methods less intimidating than more traditional recipes.  That first batch turned out very well.  It had a nice texture, with pieces of rhubarb throughout, and a bright, pleasing flavour.

I’ve made this jam many times since and it’s worked perfectly every time.  To this day, it remains one of my favourite spreads.

If you’d like to make Rhubarb Berry Jam, you’ll need:


  • 6 cups diced rhubarb (I used frozen this time)
  • 3-1/2 cups sugar
  • 1/4 cup water
  • A 3 ounce package of strawberry or raspberry flavoured dessert gelatin (I used raspberry flavour)

In a large enameled or stainless steel pot, combine the rhubarb, sugar, and water.  Stir to distribute the sugar through the fruit. 


Cook and stir over high heat until the sugar is dissolved and the mixture comes to a boil.  Reduce the heat to medium.  Boil the rhubarb, stirring to prevent scorching, until the mixture begins to thicken; 12 to 15 minutes. 


Remove the pot from the heat and sprinkle the gelatin mixture over the top of the fruit.


Stir the gelatin into the rhubarb for about 3 minutes, until it’s mixed through and the gelatin is completely dissolved. 


Ladle the jam into sterilized jars (you’ll have about 2-1/2 pints), cap the jars, and allow them cool to room temperature.


Store the jam in the refrigerator and use it within one month.  If you keep it longer than that, it’ll get very thick.

Try serving this jam with multigrain bread or stirred into yogurt.  My husband likes to use it as a topping for ice cream sundays.
___________________________________________
This post is linked to Makin' You Crave Monday hosted by Mrs. Happy Homemaker, to Craft-O-Maniac Monday Link Party hosted by Craft-O-Maniac, and to Recipe Party Time hosted by The Sweet Spot.

Sunday 12 February 2012

In the Pink


I've seen several rhubarb recipes on Pinterest recently, probably because Valentines Day is at hand and dishes cooked with rhubarb are often a lovely blushing pink colour.  There are, of course, also recipes using cherries and raspberries, but both of them are even more out of season than rhubarb is.

It'll be about three months before we see rhubarb in our local gardens but I have noticed it in the produce aisle lately.  I don't remember where it was imported from but I do remember the price, which was far higher than what I can afford to pay.  Fortunately, I still have some of last spring's rhubarb in the freezer.

Rhubarb makes a frequent appearance on our table.  Both my husband and I enjoy its tart flavour and appreciate its nutritional benefits--so much so that I was going to write a blog about rhubarb tonight.

Then I remembered that I'd already written one, last spring.

(Embarrassed blush here. I have a good memory, but it's short.  ;^)

I'll be sharing one of my favourite rhubarb jam recipes with you later this week.  In the meantime, you can find last spring's rhubarb post here.

Wellies and Birkis


These are my Wellington Gardeners.  I bought them ‘way back in the 80’s, and they cost me more than $100.00.  That was a lot of money back then.  Heck, for me, it’s a lot of money even now!

My Wellies are made of real rubber and have a reinforced shank.  It was the reinforced shank that sold me on them.  I’d suffered bruised and swollen arches too many springs; brought on by forcing shovels, spades, or forks into hard soil and through tangled roots.  The reinforced shank would spare me that discomfort.

More than twenty years have passed and my boots are still serving me well.  They are still waterproof, still work-worthy, and they still have tread on the soles.  These days, I mostly use them for walking muddy trails but I’m still very grateful to have them.


These are my Birkis (Birkenstock clogs).  I bought them in the 90’s so they’re not quite so old as my Wellies.  Like my Wellies, they cost more than $100.00.  I had to save up for them.

My Birkis are made of plastic, with cork insoles that provide great arch support.  I bought them because I was told that the arch support would help me maintain better posture and thus reduce my lower back pain. They did.

I’ve worn my Birkis a lot. Except in snow or on the very hottest days of summer, they are my every day shoes.  I love them because they’re easy to step in and out of, because they improve my posture, because they're comfortable to walk in, and because they keep going and going.  

The insoles are replaceable. I’m on my third set now. 

There’s not much tread left on the soles of my Birkis.  I’ll have to think about a new pair within the next year or so.  I’m saving up.

What do my Wellies and my Birkis have in common?  They’re not pretty but they’re practical.  They’re durable.  They're comfortable.  They’re still about the same price they were when I bought them all those years ago.  They were designed with a specific purpose in mind and they fulfill their purpose very well.  
   
Investment footwear means different things to different people:  For some it means Manolos or Jimmy Choos.  For some it means custom ordered and handmade,  For me it means Wellies and Birkis.  I’m so glad I have them.

Thursday 9 February 2012

Growing Young Farmers


We are awfully lucky in this little corner of the world.  Our valley is located within Canada’s only Maritime Mediterranean climate zone.  The average temperature here from June until August is 23˚C (73˚F).  December to January, it’s 6˚C (42˚F).  We have 155 frost free days a year.  In addition to our mild weather, we are blessed with good soil, plenty of sunshine (more than any other area on the island), and enough rain to help our crops to grow and flourish.

The Cowichan Valley is home to many small holding farms, producing a wide variety of foods ranging from beautiful asparagus to water buffalo milk for mozzarella.  We can dine on locally made cheeses, pastas made entirely from local ingredients, locally made balsamic vinegars, locally produced sea salt.  We grow tea in our valley and barley for island-distilled Scotch whiskey.  We are the second largest wine producing area in the province.

Despite our wonderful growing conditions and the variety of foods we produce, farming in our area has declined sharply in recent decades.  In 1969, Vancouver Island produced almost 70% of the food its residents consumed.  Now we produce less than 5%. So little that, if we were cut off from outside supplies, we would be able to feed ourselves for only three days. 

Food security is a big subject of discussion in this community.  We want to move towards increasing food production but the politics surrounding the subject are complex.  I don’t pretend to understand them all.  What I do know is that we have a dedicated group within our community who are working toward the goal of improving our food security.

Last week the Islands Agriculture Show took a step towards encouraging farmers in our area.  It was a tradeshow covering many aspects of farming from start-up through production and business management, through to the process of ensuring smooth succession from one generation to the next.  It was fascinating to me.  There were exhibits from the ministries of agriculture and environment, from banks and accountants, from fertilizer companies and organic growers, tractor companies, feed sellers, large holding farmers and small holding farmers.  


There was a good turn out for the show—about 1500 people—and a huge amount of information on offer.  I picked up so many brochures that they’ve provided me with hours of reading this week.   What struck me most, though, was the number of young families and school children in attendance.  I found it encouraging to see so many kids.


Seeing so many young people at the show made me particularly interested to learn about the Growing Young Farmers Society.  The society’s goal is to encourage programs in which children grow health-friendly food, in food growing areas within the school grounds or within easy walking distance of their schools, as part of the school’s regular curriculum. 

Growing Young Farmers seeks to involve youths in the growing and production of food on a substantial scale, in a structured, supervised, and mentored program.  Mentors are experienced farmers or gardeners who also have experience in supervising or teaching school-age students.

Although the Growing Young Farmers Society is newly founded, requests from school principals and teachers who wish to have their students participate in the program are increasing in number.  In order for the programs to grow and flourish, the society is in need of a number of things: 
  • Volunteers – The society is in need of grower-educators and volunteers to fulfill various other roles within the program
  • Sponsorship from local businesses
  • Assistance with grant applications

If you are interested in helping out or would like more information about the society, Dave Friend—the founding chair—has a website at http://www.friendlyorganics.ca/.  You can contact Dave by phone at (250) 704-6602 or by email at davefriend@friendlyorganics.ca.

The society’s address is:
Growing Young Farmers Society (#S-0058820)
7159 Wallace Drive
Brentwood Bay, BC
V8M 1G9